I'm not usually one for process shots, but I had to with this bread. Scroll down to see the finished product. I have always had trouble cooking with yeast until this summer. I have been making all kinds of breads and other things that require it so that I can practice, and it has been a huge success. It is amazing to me that yeast it the difference between flat dough and a puffy loaf of bread. And this bread was so worth the effort. Here is what it looked like before the oven:

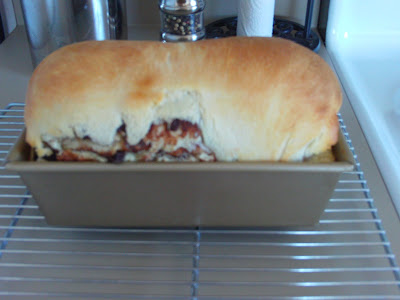
While it was cooking it filled my apartment with the most heavenly smells. I could barely wait for it to cool down enough to touch it before eating it. It was phenomenal. Dorie Greenspan, who I had never heard of about a year ago, is the author of this recipe. She has some fantastic recipes, and this is no exception. The bread is thick and chewy with just the right amount of sweetness. I should have tried it as french toast. I bet it would have been to die for. As it was, it was wonderful just plain or toasted with butter. Please don't be afraid of the yeast. Use it. It makes delicious food that makes your tummy happy.

Raisin Swirl Bread
from Baking: From My Home to Yours by Dorie Greenspan
Bread:
1 packet active dry yeast (if you buy the jars like me, that's 2 1/4 teaspoons)
1/4 cup sugar, plus a pinch
1 1/4 cups just-warm-to-the-touch whole milk (I used 1%)
4 tablespoons unsalted butter, at room temperature
3/4 teaspoon salt
1 large egg
1/4 teaspoon vanilla extract (optional, I used it)
Grated zest of 1/2 orange (optional, I didn't use it)
Pinch of freshly grated nutmeg (optional, to be honest, I don't remember if I used it)
3 1/4 to 4 cups flour
Swirl:
1 tablespoon sugar
2 teaspoons cinnamon
2 teaspoons unsweetened cocoa powder (optional, I used it)
1 cup moist, plump raisins (dark or golden)
3 tablespoons unsalted butter, softened to a spreadable consistency
To Make the Bread - Put the yeast in a small bowl, toss in the pinch of sugar and stir in 1/4 cup of the warm milk. Let rest for 3 minutes, then stir - the yeast may not have dissolved completely and it may not have bubbled, but it should be soft (mine did bubble).
Working with a stand mixer, preferably fitted with the paddle attachment, combine the remaining 1 cup milk, the butter and the remaining 1/4 cup sugar and mix on low speed for a minute or two. Add the salt, egg and vanilla, if you are using it, as well as the zest and nutmeg, if you are using them, and mix for a minute. In all likelihood, the mixture will look unpleasantly curdly (it will look even worse when you add the yeast). Add the yeast mixture and beat on medium-low speed for 1 more minute.
Turn the mixer off and add 2 3/4 cups of the flour. Mix on low speed just until you work the flour into the liquids - you'll have a sticky mix. If you've got a dough hook, switch to it now. Add another 1 cup flour, increase the mixer speed to medium and beat the dough for a couple of minutes. If the dough does not come together and almost clean the sides of the bowl, add up to 1/4 cup more flour, 1 tablespoon at a time. Keep the mixer speed at medium and knead the dough for about 3 minutes, or until it is smooth and has a lovely buttery sheen. The dough will be very soft, much too soft to knead by hand.
Butter a large bowl, turn the dough into the bowl and cover the bowl tightly with plastic wrap. Put the bowl in a warm place and let the dough rise until it is doubled in size, about 1 1/2 hours.
Scrape the dough onto a large piece of plastic wrap, wrap it and put it in the freezer for 30 minutes to firm enough to be rolled easily. (At this point, you can instead refrigerate the dough overnight if that's more convenient.)
To Make the Swirl and Shape the Loaf - Butter a 9x5 inch loaf pan. Whisk together the sugar, cinnamon and cocoa, if using.
Put the dough on a large work surface lightly dusted with flour, lightly dust the top of the dough and roll the dough into a rectangle about 12x18 inches. (I can never seem to get a perfect rectangle. If you can't, don't worry about it.)
Gently smear 2 tablespoons of the butter over the surface of the dough - this is most easily done with your fingers. Sprinkle over the sugar mixture and scatter over the raisins. Starting from a short side of the dough, roll the dough up jelly-roll fashion, making sure to roll the dough snugly. Fit the dough into the buttered pan, seam side down, and tuck the ends under the loaf.
Cover the pan loosely with wax paper (or a towel) and set in a warm place; let the dough rise until it comes just a little above the edge of the pan, about 45 minutes.
Getting Ready to Bake - When the dough has almost fully risen, center a rack in the oven and preheat to 375. Line a baking sheet with parchment or a silicone mat. (I didn't use the baking sheet.)
Melt the remaining tablespoon of butter, and brush the top of the loaf with the butter. Put the pan on the baking sheet and bake the bread for about 20 minutes. Cover loosely with a foil tent and bake for another 25 minutes or so, until the bread is golden and sounds hollow when the bottom of the pan is tapped. Transfer the pan to a rack and cool for 5 minutes, then unmold. Invert the bread and cool to room temperature right side up on the rack.
3 comments:
That bread looks so good, I wanted to eat it right off the page! I wish I could bake well at high altitude! I think I've figured out cookies, but my cakes still suck. :(
and you say you dont take good pictures check these out! they look amazing!
You said not to be afraid of cooking with yeast but I kind of am. What are your suggestions on what works for you?
Post a Comment