Showing posts with label yeast. Show all posts

Monday, November 15, 2010

Coney Island Hot Dogs with Homemade Buns


I have always loved coneys from Sonic.  Yes, some of you may scoff.  And yes, I am aware of how low brow a coney may seem, but come on!  Hot dogs with chili and cheese?  Yes please!  These turned out really well.  The chili was slightly sweet for my taste, so I think I would decrease the brown sugar next time, but the hot dog buns turned out just beautifully and were so much better than the storebought kind.


Yummy yummy!  This is a highly kid friendly meal as well.  And it can always be customized.  My daughter didn't have any of the chili, but she had some ketchup and cheese.  It's so easy to make this meal fit anyone's tastes.  Try some soon!

Coney Island Hot Dog Sauce
adapted slightly from Mommy's Kitchen

1 lb ground turkey
2 cloves garlic, minced
2 - 3 tablespoons chili powder
1 tablespoon prepared mustard
1 (6 oz) can tomato paste
1 1/2 cups water
2-3 tablespoons brown sugar
1 tablespoon Worcestershire
Salt and pepper to taste
hot dogs and hot dog buns (recipe follows)

Brown the meat in a skillet over medium-high heat.  Make sure to break up the meat as fine as possible (a potato masher works great (I just used the back of my spoon and worked it a little more than usual)). When the meat is cooked, drain and return to the skillet. Add the garlic and cook for a couple minutes. Add the remaining ingredients except the hot dogs and add the mixture to your crock pot. Turn the crock pot on low and cook for 2 hours. Serve the Coney sauce on top of cooked hot dogs with diced onions and mustard.
To cook the sauce on the stove, prepare the mixture the same way and just simmer on low for about 45 minutes to 1 hour. (I used the stove method, and it was just as easy and much faster.)


Homemade Hot Dog Buns
adapted slightly from At the Baker's Bench

3 cups flour
1/4 cup vegetable oil
2 tablespoons sugar
2 teaspoons active dry yeast
1 1/4 teaspoons salt
1 cup warm water

In the bowl of a stand mixer, put salt and warm water.  Sprinkle the yeast over the water and allow to bloom for 5 minutes.  Add flour, vegetable oil and sugar.  Knead using the dough hook until it’s smooth and satiny, then put it in an oiled bowl. Turn the dough over to coat it with oil, or brush the surface lightly with oil, and cover the bowl. Let the dough rise in a warm, draft-free spot until it’s doubled, about 1 hour.
Gently de-gas the dough by pressing your fist down into it, shape it into a 12-inch log, cover with a piece of oiled plastic wrap, and let rest for 10 minutes. Roll the dough into a 20 x 8-inch strip. Cut the dough (a pizza wheel works well here) into ten 4-inch squares. (Cut in half lengthwise, then into fifths vertically.) Shape each square by folding it over, pressing the edges to seal them, then rolling to form a bun about 6 inches long. Flatten the buns till they’re about 2 inches wide, and transfer them to lightly greased or parchment-lined baking sheets, leaving 3 inches between them. Note: If you prefer to tear the buns apart from one another after they’re baked, place them so they’re only about 3/4-inch apart. Cover the buns with a piece of oiled plastic wrap, and allow them to rise for 45 to 60 minutes, until they’re puffy.
Bake the buns in a preheated 350°F oven for 16 to 18 minutes, until they’re golden brown. Remove them from the oven, cool them on a rack, and store tightly wrapped, or freeze.

Monday, September 20, 2010

Sausage and Artichoke Calzones

Calzones are so much easier to make than I expected them to be.  And these turned out beautifully.  My only regret is that I forgot to use the cool calzone maker that my husband got me for my birthday.  Drat!  But I will next time.  I'm sure they would have turned out even prettier if I had, but oh well.  I'm sure that I will be making these again soon.  Bring them on a picnic since they are pretty clean and can be eaten with your hands!


Sausage and Artichoke Calzones
from Pizza and Other Savory Pies
Makes 2 calzones

1/2 lb sweet or hot Italian sausage, casing removed (I used chicken sausage)
1 egg
1 tablespoon milk
Flour, for dusting
1 ball Thin Crust Pizza Dough, at room temperature (recipe follows)
Salt and freshly ground pepper
1 jar (6.5  oz) marinated artichoke hearts, drained and cut into bite-sized pieces
1 oz Parmesan, finely grated, plus 1 tablespoon for sprinkling
2 oz Italian fontina or smoked mozzarella cheese, shredded (I used regular mozzarella)
6-8 fresh basil leaves, torn into small pieces
1/2 cup pizza sauce

Place a pizza stone on a rack in the lower third of the oven and preheat to 450.  Let the pizza stone heat for 45-60 minutes.
In a frying pan over medium-low heat, saute the sausage, breaking it up into small pieces with a spoon, until no trace of pink remains, 5-7 minutes.  Drain on paper towels and set aside.  In a bowl, lightly beat together the egg and milk.
On a lightly floured work surface, divide the dough in half and shape each half into a ball.  Place a sheet of parchment paper on the work surface and set the first ball of dough in the center.  Cover the second dough ball with a clean kitchen towel and set aside.  Dust the top of the dough with flour and, using a rolling pin, roll out to a 7-inch round of even thickness.  Repeat with the second ball of dough.  Cover both rounds with a clean kitchen towel and let rise for 5 minutes.
Season the first dough round lightly with salt and pepper.  Spoon 1/2 of the artichokes over one half of the dough round, leaving a 3/4-inch border uncovered.  Top the artichokes with 1/2 each of the cooked sausage, Parmesan, fontina and basil.  Make sure the filling isn't mounded too high in the center; it should evenly half of the dough round.  Gently fold the uncovered half over the covered half to enclose the filling.  Firmly pinch and crimp the edges to seal.  Repeat with the second dough round.  Brush the tops of the calzones with the egg mixture and sprinkle each with 1/2 tablespoon of the remaining Parmesan.  Cut a small steam vent in the top of each calzone.  Using a pizza peel or rimless baking sheet, carefully slide the calzone-topped parchment paper sheets onto the hot pizza stone.  Bake until golden, about 15 minutes.
Using the pizza peel or rimless baking sheet, remove the calzones from the oven and transfer to a cutting board.  Let stand for 15-20 minutes, then cut into halves and serve warm.  If desired, serve the tomato sauce on the side.

Thin-Crust Pizza Dough
from Pizza and Other Savory Pies
Makes 2 balls of dough

3 1/3 cups flour
1/4 cup whole wheat flour (I've made it with just regular flour too, and it works fine)
1 package (2 1/2 teaspoons) quick-rise yeast
1 tablespoon sugar
1 tablespoon salt
1 1/4 cups warm water (110 F), plus more as needed
2 tablespoons olive oil, plus extra as needed

In a food processor, combine the flours, yeast, sugar and salt.  Pulse to mix the ingredients.  With the motor running, add the water and olive oil in a steady stream, and then pulse until the dough comes together in a rough mass, about 12 seconds.  If the dough doesn't  form into a ball, sprinkle with 1-2 teaspoons of water and pulse again until a rough mass forms.  Let the dough rest for 5-10 minutes  Process again for 25-30 seconds, steadying the top of the food processor with one hand.  The dough should be tacky to the touch but not sticky.  Transfer the dough to a lightly floured work surface and form it into a smooth ball.  Place the dough in a large oiled bowl, turn to coat with oil, and cover with plastic wrap.  Let the dough rise in a warm place until doubled in bulk and spongy, about 1 1/2 hours.
Turn the dough out onto a lightly floured work surface, punch it down, and shape into a smooth cylinder.  Divide the dough into 2 equal pieces.  Shape each piece into a smooth ball, dusting with flour only if the dough becomes sticky.  Cover both balls of dough with a clean kitchen towel and let rest for 10 minutes before proceeding with your chosen pizza recipe.  If you are using only one ball of dough, place the second ball in a gallon-size zipper-lock bag and freeze for up to 2 months.  (When ready to use, thaw the frozen dough for 3-4 hours at room temperature.

Wednesday, July 21, 2010

Raisin Swirl Bread

I'm not usually one for process shots, but I had to with this bread.  Scroll down to see the finished product.  I have always had trouble cooking with yeast until this summer.  I have been making all kinds of breads and other things that require it so that I can practice, and it has been a huge success.  It is amazing to me that yeast it the difference between flat dough and a puffy loaf of bread.  And this bread was so worth the effort.  Here is what it looked like before the oven:

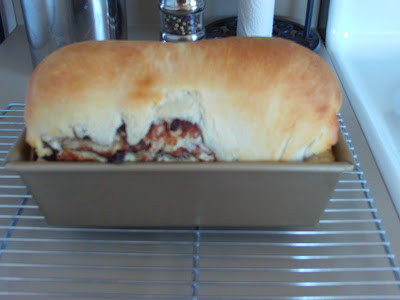
Here is what it looked like after:
While it was cooking it filled my apartment with the most heavenly smells.  I could barely wait for it to cool down enough to touch it before eating it.  It was phenomenal.  Dorie Greenspan, who I had never heard of about a year ago, is the author of this recipe.  She has some fantastic recipes, and this is no exception.  The bread is thick and chewy with just the right amount of sweetness.  I should have tried it as french toast.  I bet it would have been to die for.  As it was, it was wonderful just plain or toasted with butter.  Please don't be afraid of the yeast.  Use it.  It makes delicious food that makes your tummy happy.

Raisin Swirl Bread
from Baking: From My Home to Yours by Dorie Greenspan

Bread:
1 packet active dry yeast (if you buy the jars like me, that's 2 1/4 teaspoons)
1/4 cup sugar, plus a pinch
1 1/4 cups just-warm-to-the-touch whole milk (I used 1%)
4 tablespoons unsalted butter, at room temperature
3/4 teaspoon salt
1 large egg
1/4 teaspoon vanilla extract (optional, I used it)
Grated zest of 1/2 orange (optional, I didn't use it)
Pinch of freshly grated nutmeg (optional, to be honest, I don't remember if I used it)
3 1/4 to 4 cups flour

Swirl:
1 tablespoon sugar
2 teaspoons cinnamon
2 teaspoons unsweetened cocoa powder (optional, I used it)
1 cup moist, plump raisins (dark or golden)
3 tablespoons unsalted butter, softened to a spreadable consistency

To Make the Bread - Put the yeast in a small bowl, toss in the pinch of sugar and stir in 1/4 cup of the warm milk.  Let rest for 3 minutes, then stir - the yeast may not have dissolved completely and it may not have bubbled, but it should be soft (mine did bubble).
Working with a stand mixer, preferably fitted with the paddle attachment, combine the remaining 1 cup milk, the butter and the remaining 1/4 cup sugar and mix on low speed for a minute or two.  Add the salt, egg and vanilla, if you are using it, as well as the zest and nutmeg, if you are using them, and mix for a minute.  In all likelihood, the mixture will look unpleasantly curdly (it will look even worse when you add the yeast).  Add the yeast mixture and beat on medium-low speed for 1 more minute.
Turn the mixer off and add 2 3/4 cups of the flour.  Mix on low speed just until you work the flour into the liquids - you'll have a sticky mix.  If you've got a dough hook, switch to it now.  Add another 1 cup flour, increase the mixer speed to medium and beat the dough for a couple of minutes.  If the dough does not come together and almost clean the sides of the bowl, add up to 1/4 cup more flour, 1 tablespoon at a time.  Keep the mixer speed at medium and knead the dough for about 3 minutes, or until it is smooth and has a lovely buttery sheen.  The dough will be very soft, much too soft to knead by hand.
Butter a large bowl, turn the dough into the bowl and cover the bowl tightly with plastic wrap.  Put the bowl in a warm place and let the dough rise until it is doubled in size, about 1 1/2 hours.
Scrape the dough onto a large piece of plastic wrap, wrap it and put it in the freezer for 30 minutes to firm enough to be rolled easily.  (At this point, you can instead refrigerate the dough overnight if that's more convenient.)

To Make the Swirl and Shape the Loaf - Butter a 9x5 inch loaf pan.  Whisk together the sugar, cinnamon and cocoa, if using.
Put the dough on a large work surface lightly dusted with flour, lightly dust the top of the dough and roll the dough into a rectangle about 12x18 inches.  (I can never seem to get a perfect rectangle.  If you can't, don't worry about it.)
Gently smear 2 tablespoons of the butter over the surface of the dough - this is most easily done with your fingers.  Sprinkle over the sugar mixture and scatter over the raisins.  Starting from a short side of the dough, roll the dough up jelly-roll fashion, making sure to roll the dough snugly.  Fit the dough into the buttered pan, seam side down, and tuck the ends under the loaf.
Cover the pan loosely with wax paper (or a towel) and set in a warm place; let the dough rise until it comes just a little above the edge of the pan, about 45 minutes.

Getting Ready to Bake - When the dough has almost fully risen, center a rack in the oven and preheat to 375.  Line a baking sheet with parchment or a silicone mat.  (I didn't use the baking sheet.)
Melt the remaining tablespoon of butter, and brush the top of the loaf with the butter.  Put the pan on the baking sheet and bake the bread for about 20 minutes.  Cover loosely with a foil tent and bake for another 25 minutes or so, until the bread is golden and sounds hollow when the bottom of the pan is tapped.  Transfer the pan to a rack and cool for 5 minutes, then unmold.  Invert the bread and cool to room temperature right side up on the rack.

Saturday, June 5, 2010

Basic Dinner Rolls

And here's the third from my 100 Things list. Dinner rolls. Yes, that may seem boring, but I have never been good at yeast, and I've always wanted to be able to make some rolls to go with dinner. To be honest, I wasn't totally thrilled with this recipe. I'm not sure if it was the ingredients or what, but the texture was slightly off and the taste was a little bit bland. They were very easy and fast though, so if you want some practice with yeast, this is a good recipe to try. Click here for the link to the recipe.

Sunday, May 30, 2010

Overnight Cinnamon Rolls

Holy goodness. These are to die for. I made a project for myself this year of mastering baking with yeast. I have never had much luck with it, but I've always wanted to be able to make my own bread, pizza, and yes, cinnamon rolls. I tried some pizza last week, and since it was successful I thought I could move on to cinnamon rolls. I was absolutely thrilled when they started to rise! This is what they looked like before going into the refrigerator the night before.
I got up a little bit early to take them out of the refrigerator, and then we baked them before going off to the Memorial Day parade in town. They were simply gorgeous.
And delicious. I fully intended to take pictures of individual cinnamon rolls and us eating them, but once I took a bite, I couldn't will myself to stop. They were soft, warm, and the vanilla glaze was wonderful. The only thing I might have done differently is to make a double batch of the glaze. They are slightly time consuming, but the good part is that all of the work (except the glaze) is done the night before, leaving you to a leisurely morning smelling cinnamon rolls in the oven. This book has become one of my very favorites. Enjoy!

Overnight Cinnamon Rolls
from Family Meals: Creating Traditions in the Kitchen by Maria Helm Sinskey

For the dough:
1 tablespoon active dry yeast
1/2 cup warm water (105 degrees)
4 1/2 cups flour
4 eggs
1/4 cup sugar
2 teaspoons salt
1/2 cup unsalted butter, at room temperature

1/2 cup unsalted butter, melted
1/2 cup sugar mixed with 1 tablespoon cinnamon

For the Vanilla Glaze:
1 cup powdered sugar
1/2 teaspoon salt
2 tablespoons unsalted butter, melted
2 tablespoons whole milk
1 teaspoon vanilla

To make the dough, in the bowl of a stand mixer, sprinkle the yeast over the water, allow to bloom for a few minutes, then whisk until smooth. Whisk in 1/2 cup of the flour. Cover with plastic wrap and let stand in a warm spot, about 30 minutes.
Add the eggs, sugar, salt and remaining 4 cups flour to the yeast mixture. Fit the mixer with the dough hook and knead on medium speed until smooth, 3-4 minutes. Add the room temperature butter and continue to knead, adding a little flour to reduce stickiness if needed (I added quite a bit), until the dough is smooth, 10-12 minutes. Cover with plastic wrap, and let rise until doubled, about 2 hours.
Butter a 9x13 baking dish. Transfer the dough to a floured work surface. roll out into a 15x10-inch rectangle. Brush the rectangle with half of the melted butter, leaving a 2-inch wide strip uncovered on one long side. Sprinkle the cinnamon sugar over the butter. Starting at the long side covered with sugar, roll up the rectangle snugly and pinch the seam together. With the seam facing down, cut into 10 equal pieces. Place the pieces, cut side up, in the dish. Brush with the remaining butter. Cover with plastic wrap and let rise in the refrigerator overnight.
The next morning, remove from the refrigerator and let rise until half again as high, about 1 hour. Preheat the oven to 350. Bake until golden brown, about 30 minutes. Let cool in the pan for 15 minutes. Spread the glaze over the warm rolls and serve.

To make the glaze, in a small bowl, sift together the powdered sugar and salt. In a separate bowl, whisk together the butter, milk and vanilla and stir into the sugar to form a smooth paste.
Related Posts with Thumbnails